Select existing album
Manage your albums created with the AlbumCreator (view, find, delete or modify). Change album name and view album properties. Print all images of the selected album. All operations can be performed with the help of corresponding buttons, keyboard shortcuts or shortcut menu.
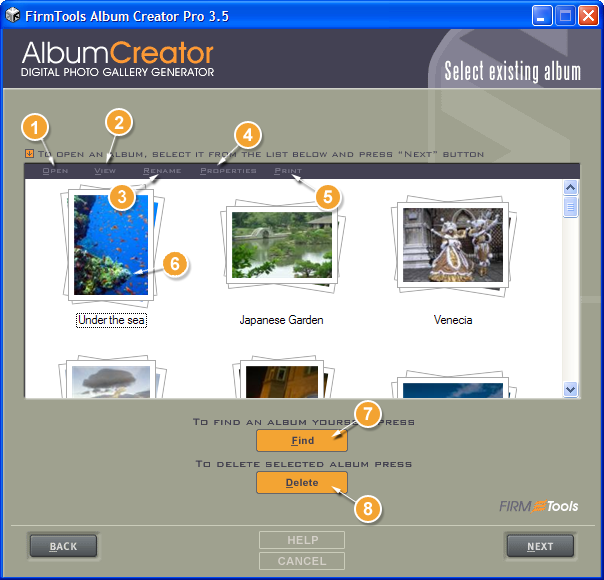
- Click Open to modify the selected album project, change the theme or add/remove images.
- Click View to open the generated album in the default web browser (please note, the album should be generated before).
- Click Rename to change the name of the selected album project (please note, the project name is not a title of the album).
- Click Properties to view the project information.
- Click Print to print all photos used in the album project.
- When you click the right mouse button on the selected album thumbnail, a shortcut menu appears.
- Click Find to search for the album project if it is not located in the default folder.
- Click Delete to remove the selected album project, this will not remove the generated album (Attention! This action can not be undone!)
You can manually manage the album project files. Files have the ACP file extension, they are XML compatible, and usually located in the C:\My PhotoAlbums\Projects\ folder (depends on the installation).